Rider cannot connect to LiteLLM AI provider

I've set-up LiteLLM on my development machine and cannot connect to it if I dont explicitly remove the virtual api key from the LiteLLM server. Here is when I try connecting to the server:
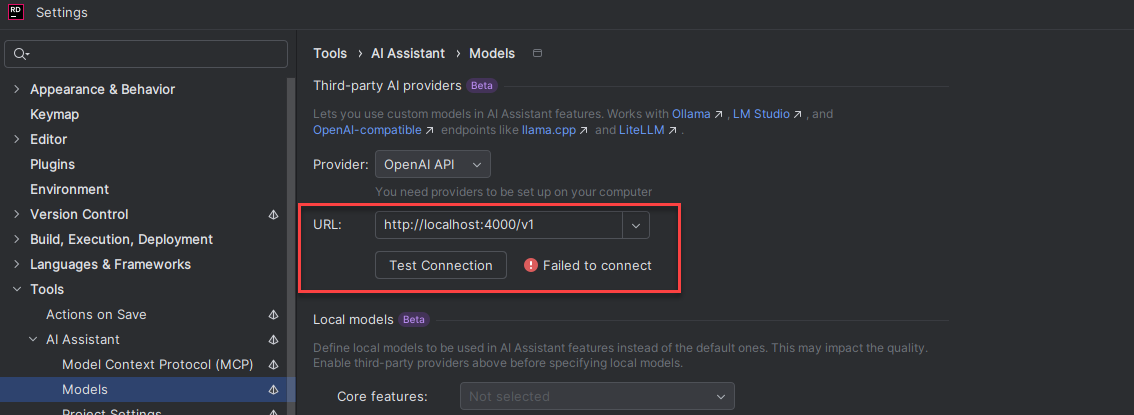
The server logs the following error when the user clicks on “Test Connection”:
16:19:03 - LiteLLM Proxy:ERROR: auth_exception_handler.py:79 - litellm.proxy.proxy_server.user_api_key_auth(): Exception occured - LiteLLM Virtual Key expected. Received=raspberry, expected to start with 'sk-'.
First, a virtual key is a key generated on the server, so clients are able to make identifiable requests to that server.
Second, that error message means whoever developed and tested this functionality on Rider probably used a Raspberry Pi to do so, and they used the key “raspberry” for the connections. Now, the server requires the virtual key to start with the industry (or OpenAI) standard key prefix “sk-”. Also, that key can be generated in 2 ways:
- Via environment variable when running the server. In this case the user can choose how the key looks like, as long as it starts with “sk-”.
- Generating a new key on the UI web app of the server. In this case, the server generates a key that has prefix “sk-”.
So I would suggest you add a text box to the setting window where the user is able to input a virtual key (or not, if his server supports it without using a virtual key)
Update: I've created a ticket “RIDER-130926 Rider cannot connect to LiteLLM AI provider”
Please sign in to leave a comment.
Hello,
We appreciate your feedback — the team is actively working on expanding BYOK (Bring Your Own Key) support.
Using your own API key from an external cloud provider (e.g., Anthropic, ChatGPT) isn’t supported yet with individual subscriptions.
For updates, please follow and vote for the related request: LLM-11585 Bring your own LLM API key for individual/personal license of AI Pro
OpenAI compatibility (see LLM-15339 Third party providers: use OpenAI API for all ) is currently intended only for local LLMs — for example, those running via Ollama, LM Studio, or other self-hosted environments.
I got this working.
I'll just leave the HOW here for others to find.
Clone the litellm repo.
Create a config.yaml as per the instructions (I placed mine in the root of the project).
Configure the models you want here. You could copy the config below:
config.yaml:
In the docker compose file uncomment the part which injects this config.yaml file into the image.
in the .env configure your salt key and openrouter api key:
LITELLM_SALT_KEY="[some key]"OPENROUTER_API_KEY=[openrouter api key]Now just build and run the docker compose.
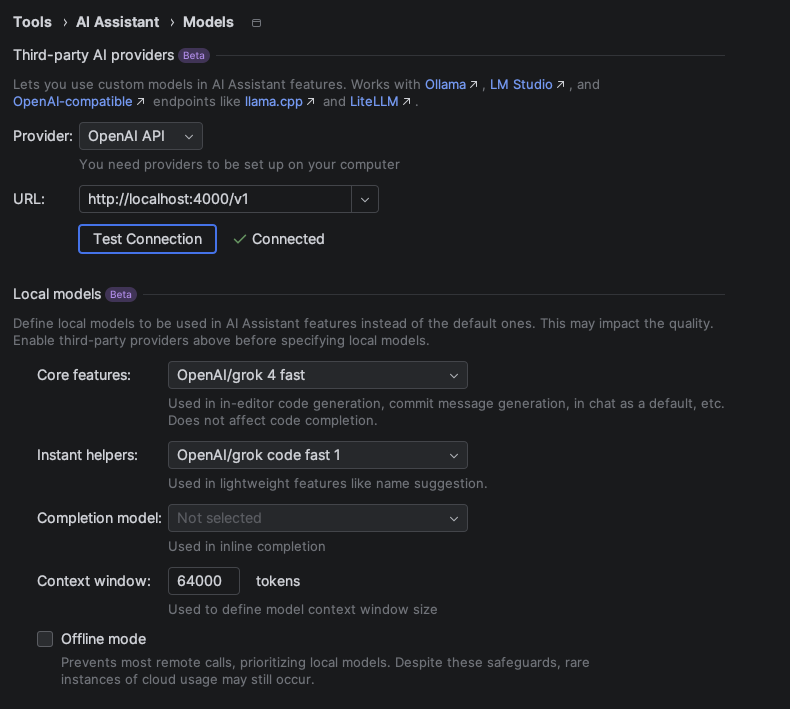
Now configure your jetbrains ai assisstant models page like this: